You’ll get fall-apart tender beef in about 90 minutes with an Instant Pot when you follow a few precise steps. Sear a well‑marbled chuck for a deep crust, deglaze to lift every fond, then pressure‑braise with stock, aromatics and a splash of wine. Keep going to master timing, jus reduction and perfect shredding.
Key Takeaways
- Use a well‑marbled 2–3 lb chuck roast (or brisket/bottom round) for fall‑apart tenderness in an Instant Pot.
- Sear roast on Sauté (More) after patting dry and salting to develop a deep Maillard crust and fond.
- Braise with low‑sodium beef stock, aromatics, a splash of red wine or vinegar, and tomato paste for balanced depth.
- Pressure cook ~30–35 minutes per pound on High (60–70 minutes total for 2–3 lb), then allow a 10–15 minute natural release.
- Rest 10–15 minutes under foil, skim/reduce juices on Sauté, then shred with forks and adjust salt and acidity to taste.
Ingredients and Smart Pantry Swaps
You’ll start with a good chuck roast (2–3 pounds) or a comparable cut like brisket or bottom round if chuck isn’t available. Choose fresh aromatics—onion, garlic, carrots—and salt generously to develop crust before searing. For liquid, use beef stock and a splash of red wine or balsamic for depth; broth concentrate works in a pinch. Embrace smart pantry swaps: canned tomatoes instead of fresh, instant espresso instead of coffee for richness. Plan Herb preservation by freezing chopped herbs in oil cubes for consistent flavor, and employ Spice substitutions like smoked paprika for chipotle or ground coriander for cumin when needed. Measure precisely, layer flavors deliberately, and avoid excess ingredients that mask beef’s natural profile. Use minimal sugar; let umami and aromatics lead the profile.
Equipment and Instant Pot Settings
Choose a 6‑ to 8‑quart electric pressure cooker (a 6‑quart fits most 2–3 lb roasts) and have a sturdy metal trivet, long tongs, and a good instant‑read thermometer on hand; use the Instant Pot’s Sauté (More) to brown the meat in the stainless steel pot insert, then switch to Pressure Cook/Manual on High. You’ll also want a heatproof silicone or glass lid for resting, an insert rack for stacking vegetables, and heavy-duty oven mitts. Accessory recommendations include a steamer basket and a nonstick liner for easy cleanup. For precision, calibrate sear temperature and use Preset customization to save a 90‑minute cycle with natural release parameters. Test your thermometer and tongs before starting; this gear reduces variables and improves repeatability.
Preparing and Trimming the Beef
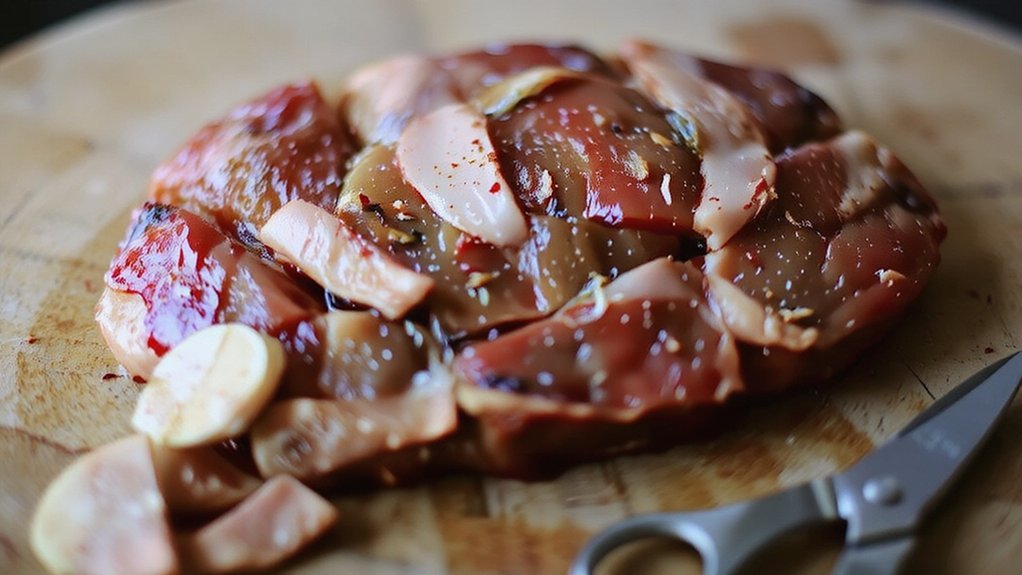
You’ll start by choosing a well-marbled cut like chuck roast or brisket for rich flavor and fork-tender results. Trim away excess silver skin and large hard fat pockets while leaving a thin fat cap to baste the meat. If the roast is uneven, tie it at 1–2 inch intervals to promote uniform cooking and presentation.
Choosing the Cut
While tougher, well-marbled cuts like chuck, brisket, or bottom round give the best texture after pressure cooking, so pick a piece with visible marbling and enough connective tissue to break down into tender strands. You’ll prioritize marbling importance because fat interspersed in muscle melts and lubricates fibers, producing that fall-apart mouthfeel. Choose a roast sized for your Instant Pot’s capacity and think about Local sourcing—buying from nearby farms lets you assess handling and grade. Opt for USDA Choice or equivalent for consistent intramuscular fat. Inspect color, odor, and a firm but elastic texture; avoid dry-surfaced or excessively wet packages. Innovate by selecting single-muscle pieces for experimental spice-permeation, but keep the cut’s collagen content high. Consider bone-in roasts for broader flavor development in the pot.
Trimming and Tying
Trim excess fat and silver skin from the roast, leaving a thin cap of fat (about 1/4 inch) to render and baste the meat during cooking. You’ll pare away sinew and large flaps with a sharp boning knife, angling the blade parallel to the meat for clean cuts. Keep trimmings for stock or crisping. Tie the roast at 1–1.5-inch intervals using butcher knots to guarantee even shape and consistent doneness; practice a secure, repeatable loop. Use food-safe butcher twine and avoid overtightening, which can squeeze juices. Inspect and perform routine tool maintenance—hone blades, replace frayed twine, and sterilize surfaces—so your prep stays precise and innovative. Efficient trimming and tying reduces cook time and improves final texture. Label trimmed portions for portions and recipe flexibility.
Searing for Maximum Flavor
Because searing creates a deep, flavorful crust, pat the roast very dry, season generously, and heat a thin layer of high-smoke-point oil until it’s shimmering. You’ll then sear on all sides to lock flavor; this step uses Maillard chemistry to build complexity, so work quickly and don’t crowd the pan—Crowding prevention is essential or you’ll steam instead of brown. Use high heat, steady contact, and a flat surface; flip with tongs, not a fork. Aim for a dark, even crust without burning. You’ll hear a loud, consistent sizzle as bonds transform rapidly.
Pat dry, season, and sear on all sides—high heat, steady contact, loud sizzle, deep brown crust
- Sizzling oil rippling around muscle fibers
- Rich brown crust flecked with caramelized bits
- Aromas of roasted beef and toasted spices
- Crisp edges yielding to tender interior
- Confident rhythm of flips and pauses
Building the Braising Liquid
Balancing braising liquid starts with a flavorful, low-sodium stock as your base, then you’ll add aromatics, an acid, and a splash of wine or beer to lift the beef’s richness. You’ll build a clear flavor hierarchy: aromatics (onion, garlic, celery) for base notes, herbs for midnotes, an acid like tomato paste or vinegar to brighten, and a restrained splash of alcohol to release fat-soluble flavors without overpowering. Deglaze the seared fond with wine or beer, scraping fond into the liquid so the alcohol role becomes functional—extracting and carrying flavor rather than dominating it. Finish by tasting and adjusting salt and acidity; the liquid should complement the roast, concentrating as it reduces under pressure to create a glossy, balanced sauce for modern, bold results consistently.
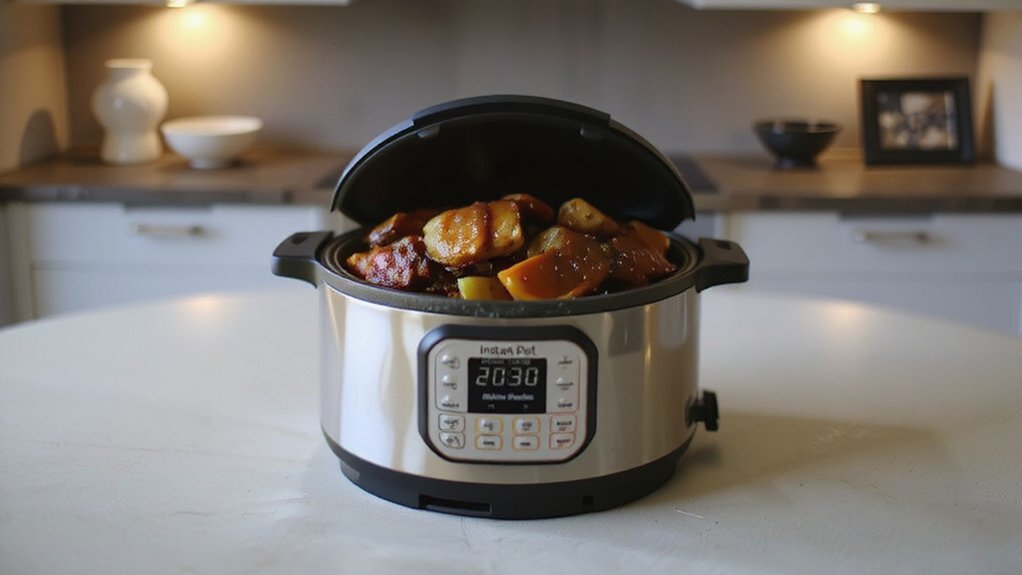
Pressure Cooking Times and Methods
You should set pressure time according to roast size: aim for roughly 30–35 minutes per pound for well-marbled chuck, with shorter times for leaner cuts. You’ll choose natural release for tender, shreddable meat or quick release when you need to stop cooking sooner and retain firmer slices. Below you’ll find precise timing ranges and clear guidance on when to use natural versus quick release to hit consistent doneness.
Timing by Roast Size
How long you cook a pot roast in the Instant Pot depends chiefly on weight, cut and whether you want sliceable or shreddable meat. For a 2 to 3 lb chuck, pressure 60 to 70 minutes gives shreddable strands; 3 to 4 lb needs 75 to 90 minutes. Leaner cuts like rump take less time for slicing. Remember Carryover cooking and factor an extra 5 to 10 minutes while resting; also plan an Altitude adjustment if you’re above 3,000 ft. Use these targets as starting points and test doneness by fork.
- Compact 2 lb, sliceable, grain visible
- 3 lb chuck, tender, shreddable
- 4 lb roast, braise long, falling-apart
- Dense rump, shorter time, sliceable
- Bone-in cut, distributes slower
Release Method Options
Although the time under pressure determines collagen breakdown, the release method controls how that breakdown finishes and whether your roast slices clean or falls apart. You’ll choose between Quick Release and Natural Release based on texture goals: use Quick Release to stop cooking immediately when you want firm slices and preserve connective tissue integrity; choose a controlled Natural Release when you want fibers to relax and the meat to shred. For medium innovation, try a hybrid: let pressure drop naturally for 10–15 minutes, then Quick Release the remainder to balance tenderness and structure. Always factor residual heat, altitude, and cut thickness into your decision. Record outcomes and adjust release duration incrementally to optimize repeatable results. This methodical approach elevates consistency in modern kitchens daily.
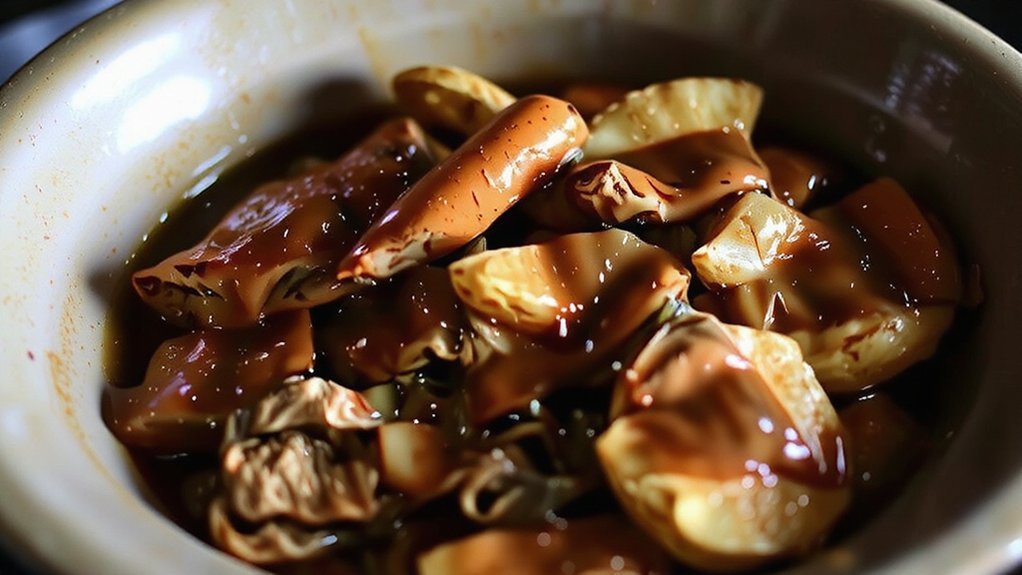
Resting, Shredding, and Gravy Finishing
Resting the roast for 10–15 minutes under a loose foil tent lets the juices redistribute so you’ll get moist, clean shreds and a clearer sauce to finish. Observe the rest duration precisely; use a fork-and-tine shred technique or two-fork pull for consistent fibers. While it rests, skim fat from juices and reduce on sauté to concentrate flavor. When shredding, work with grain, keep pieces uniform, and reserve pan juices for gravy. Finish gravy by deglazing with wine or stock, whisking in a beurre manié or cornstarch slurry to desired sheen.
- Steamy foil tent lifting
- Slow, glossy jus simmer
- Forks crossing meat fibers
- Uniform ribbon-like shreds
- Silky, clingy gravy
Taste, adjust seasoning, and strain if you want an ultra-smooth, modern sauce with glossy finish now.
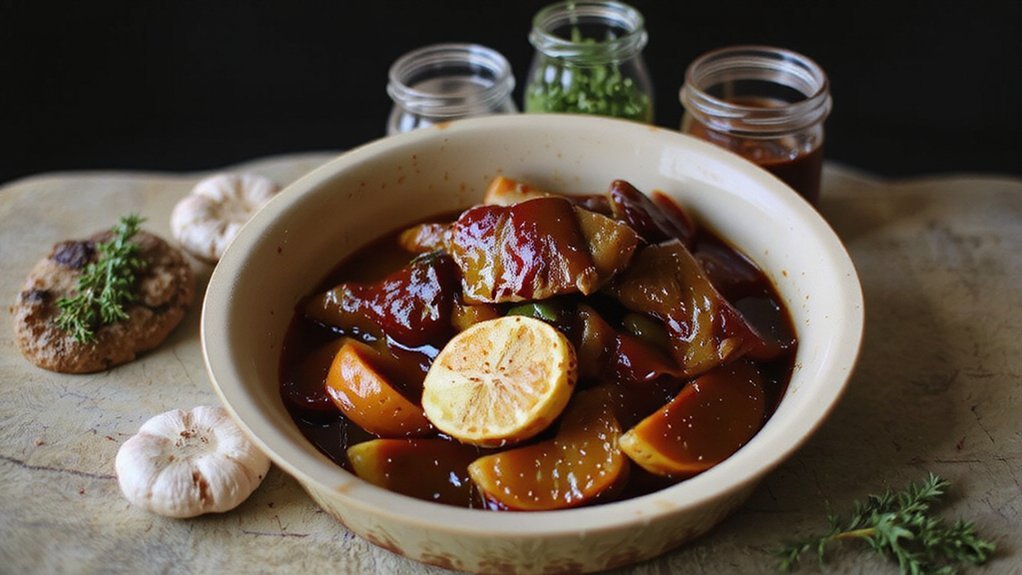
Serving, Sides, Storage, and Reheating
When you’re ready to serve, plate the shredded roast with a generous ladle of glossy jus and pair it with creamy mashed potatoes, polenta, roasted root vegetables, or crusty bread to soak up the sauce. Choose Vegetable pairings that contrast texture and brightness: charred asparagus, lemony green beans, or a shaved fennel salad. Use the table for quick service options.
| Side | Texture | Speed |
|---|---|---|
| Mashed potatoes | Creamy | 10 min |
| Roasted carrots | Sweet-crisp | 25 min |
| Polenta | Silky | 15 min |
| Crusty bread | Chewy | Ready |
| Green salad | Bright | 5 min |
Cool leftovers quickly, label, and follow Makeahead freezing guidelines: freeze in portions for three months. Reheat gently — low oven or sous-vide — to preserve jus and tenderness and aroma.
Conclusion
You’ll get reliable, fall‑apart pot roast every time by trimming and searing a well‑marbled chuck, deglazing thoroughly, and pressure‑braising with stock, aromatics, tomato paste and a splash of red wine. Use natural release for shreddable texture, then skim and reduce the juices into a glossy jus. Rest under foil briefly, shred with forks, and serve over mashed potatoes or crusty bread. Store refrigerated up to 4 days; reheat gently until piping hot throughout before serving.

&media=https://instantpot.blog/wp-content/uploads/2025/11/90_minute_instant_pot_roast_ubpk5.jpg)